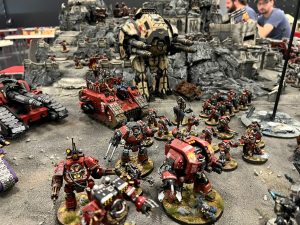
Kill Teams is fresh off the press, and it’s quite an awesome game. It follows a similar ruleset to 40K, while having just enough differences to truly make it feel like it is its own game, and not just “40K with very few models”.
To help you get the most out of your games of Kill teams, we’re continuing our series breaking down everything you could want to know about Matched Play, including the Command Roster, Specializations, the Scouting Phase, and more! This way, you’ll be completely prepared to go into any game of Kill Teams and stand a great chance of winning!
Today, we’re focusing on a player’s special abilities known as “Tactics”, and our picks for the best out of the generic options!

KT has a mechanic similar to 40K, where players earn a resource called Command Points (CP for short) which are then spent on bonus abilities. In KT, these abilities are called “Tactics”. Every Faction receives their own specific Tactics, but there are also 6 generic Tactics available to all players. They are mostly straight forward, but all the same we’ll be breaking them down for you so you can use them optimally.
Decisive Move (1CP): Decisive Move allows you to make a move action of your choice (advance, charge, etc) first, before anyone else moves any models. Your opponent can declare this Tactic as well to force a roll off to see who moves first. If your opponent is up to move first, but you have a model that could plausibly charge the enemy army, consider using Decisive Move to make the charge. This will tie up the enemy, making them unable to Fall Back, and effectively skipping the movement phase for any enemy model you charge. Conversely, you could use it to get away from an impending charge without relying on the Retreat Reaction. Smart use of Decisive Move can completely change a game, so you should always keep it in the back of your head.
Decisive Fight (2CP): Decisive Fight allows you to fight with a model ahead of the normal initiative order. Like Decisive Move, if your opponent uses it, there’s a roll off for who goes first. Decisive Fight is very conditional, to the point where most players don’t need to consider it as an option. The big exception here would be if two heavily focused melee armies where fighting one another, or even the Melee Specialists were fighting one another from two other factions. Its main use is for trying to eliminate an enemy model before they get a chance to swing, and that’s about it.
Decisive Shot (2CP): Decisive Shot allows you to shoot with a model first in a shooting phase. Like Decisive Move and Fight, Decisive Shot will cause a roll off if your opponent uses it as well. Decisive Shot is, as the name would imply, the shooting equivalent of Decisive Fight, and its use is almost as narrow. It does allow you to beat a Readied model to the punch however, and that can be useful, especially if your opponent has some crazy weapon on a Specialist who’s covering a large part of the table, or another equally undesirable situation.
Tactical Re-roll (1CP): Allows you to re-roll a single roll made for most things in the game. There’s not too much to say about the Tac Re-roll, honestly. Just keep in mind that it re-rolls a roll, not a dice, so things like Charge rolls will require you to roll everything, not just one die.
Insane Bravery (1CP): Allows you to auto pass a single Nerve Test. The wording on this Tactic makes it a bit more unreliable than it first appears. You have to use it at the beginning of the phase, and during that phase you can use it to auto pass a test. Although narrow, this does mean that you can spend the point on the ability and then not really need it. Just try to keep in mind that you can use a Tactical Re-roll on a Nerve Test as well. You may be better off waiting to roll highly on a Nerve test and just re-roll it, if you’re unlikely to fail, then you are spending a CP and probably wasting it, although the Insane Bravery avenue is guaranteed and the Tactical Re-roll is not.
Gritted Teeth (1CP): Allows you to ignore the hit penalty for having one or more Flesh Wounds on a single model of your choice. There’s not much to really say about Gritted Teeth. It’s probably not worth using it to negate a single Flesh Wound, but 2 or more on an important roll? It’s definitely worth ignoring the accuracy penalty at that point.

Clearly, each of these tactics has their own specific uses, and some will be more valuable than others depending on the flow of a battle. There may be a time where Decisive Shot allows you to score that one critical hit you need to bring a unit down, or where Insane Bravery keeps your units in the battle even when they should be fleeing in terror!
To optimize the performance of your Kill Team, you must know your particular army’s Tactics inside and out,while also which generic Tactics you have in reserve!
As always, thank you for reading, and leave a comment down below telling us which Tactics you’ve used to save yourself in battle!
Warhammer 40k Winning Lists June 11th Edition
With summer in full swing, we see a refreshing number of tournaments kick back up globally, ranging from 3 to 7 rounds
