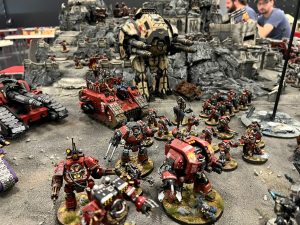
Welcome to Warhammer Tactics! Today, we’re going to be looking at the bonuses and negatives to going first or second, and when you should try to go first or second along with a couple tips to help you in that direction. For the purposes of this article, we’re going to be considering Main Rulebook missions, and ITC, as the general flow for game set up and determining who goes first are the same, and to a large degree, the pros and cons are the same as well. If the event you are attending deviates from this in a significant fashion, then you should take the information here and adapt it to how your event handles going first and winning the game. Let’s start by looking at the advantages to going first.
 The advantages to going first are pretty apparent. For starters, you get the first opportunity to cause damage to your opponent, meaning you can remove troublesome units before they get a chance to do anything. In addition, you get to set the pace of the game, as your opponent has to react to what you’re doing. If you take advantage of this, it allows you to put your opponent on the back foot, where he has to respond to what it is that you’re doing. You also are the first player to have access to Reinforcements, if you have any, which you can use to try to keep the pressure on.
 However, with good terrain and deployment, many of these advantages can be minimized. Important units can be deployed out of range or behind Line of Sight blocking terrain to keep them safe. If you’re having a hard time doing this, you probably don’t have enough Line of Sight blocking terrain on your table, and you should add a couple large pieces. In addition, going first also generally means exposing your key units first, as they have to move up the board and likely into harm’s way.
On the flip side of the coin, we have the advantages to going second. Some of them are less obvious, but they are definitely important to consider. Off the bat we have the new Prepared Positions stratagem, which allows you to give your entire army cover for 2 CP, as long as it’s in your own deployment zone. Some armies will benefit from this more than others, as bonuses to your saves are more impactful on higher saves than lower saves. In other words, it’s far more useful to turn a 3+ save into a 2+, than it is to turn a 6+ save into a 5+.
More importantly than that, however, is that going second gives you the freedom to respond to your opponent. Your opponent has to set the pace, but you’re free to handle his movements as you please. If your opponent takes an objective, you know that if you take it back, or at least clear him off it, he won’t get any points for that objective. This is particularly powerful for Main Rulebook missions, as you can easily steal an objective or two from your opponent just before the game ends, stealing the entire game.
Finally, you have the advantage of making your opponent deploy his Reinforcements first. This isn’t a big deal if you don’t have a lot of Reinforcements yourself, but if both players have a lot of Reinforcements, this puts your opponent in a rather precarious position, as it’s very easy for you to drop your Reinforcements in response to your opponents, wiping them out. If you’ve screened properly, than your opponent’s Reinforcements won’t do nearly as much damage as yours will, which is a net positive trade for you.
 So, the real question is: Which is better? Going first, or going second? Well, the answer is, it depends. If you’re playing at a local event where you can’t adjust the terrain, and you’re playing on Planet Bowling Ball where there’s not a single piece of meaningful terrain in sight, than going first is obviously best. On the other hand, if you and your opponent are both playing armies with heavy amounts of Reinforcements, you’re probably going to want to go second, that way you can use your Reinforcements to pressure your opponent into dropping his Reinforcements in first.
These are obviously just two extreme examples, but it’s the principle here that matters. It’s rare that you’ll have a list that usually wants to go first, or usually wants to go second, unless it’s built for exactly that. However, these lists do exist and it’s important to be able to identify them. For example, the ever popular Castellan+Imperial Guard+Blood Angels army usually wanted to go first so it could remove the main threats that could destroy the Castellan, leaving it free to rain destruction on the enemy unhindered for the rest of the game. Obviously, this particular list is far less powerful now, but it’s a great example of an army that usually wants to go first.

Alternatively, Tau provide a solid example of an army that usually wants to go second. Tau can be a surprisingly mobile force, as many of their units have the FLY keyword, and they can ignore the penalty for moving and firing Heavy weapons thanks to Markerlights. In addition, Tau tend to have above average saves on most of their units, making Prepared Positions a fairly useful tool for them. They also have the range to respond to their enemies actions, while not exposing themselves in any significant way.
Now that you have an idea of the value of going first or second, and the sorts of armies that might want to go first or second, what can you actually do to help guarantee you end up in the position you want to be in? Ultimately, there’s a lot of dice rolling involved, and there’s nothing you can do about that. However, there are a couple of things that you can to help you receive the +1.
Before you and your opponent begin deploying, you should evaluate how many units you each have to deploy, and if you or your opponent have any Transports. There are a few reasons for this. Baseline, whoever has less deployments will almost always be finishing first, meaning they get a +1 to their roll for the roll off to determine who goes first. Knowing who is going to get this bonus at the beginning of your deployment can help inform certain decisions that you make. If neither of you have any transports, there’s nothing you can do. But, what if you do have a transport? Let’s look an example.
Imagine for a moment that you have an army that comprises a total of 14 units (here after referred to as drops), and your opponent has 13. Your opponent is also deploying first. This means that when your opponent deploys his last unit, you will have 2 drops left. So, to get the first turn, you need to find a way to cut down at least 3 drops somehow, so you can finish first. This is where Transports come in. Transports can legally carry multiple units, as long as all the units match the Transport’s carrying capacity, and the models can legally go inside the Transport. Let’s say we have a unit of 10 Khorne Berzerkers and a Rhino for the Berzerkers to ride in. The 10 Berzerkers can be deployed inside the Rhino to reduce our number of drops by 1, as we deploy the Berzerkers automatically inside the Rhino. However, we need to reduce our drops by 3, not 1.

If we instead deploy the Rhino with a couple of characters and a unit of say 5 Chaos Space Marines, we have reduced our drop count by 3, which nets us the +1 to go first. On our first turn, we can simply disembark all of our units, then have our 10 man unit of Khorne Berzerkers hop in, and the Rhino drives off with its intended cargo. As an added bonus, the models inside the Rhino get an extra 3” of movement, since they disembark within 3” of the Rhino and then move normally. Now, this doesn’t mean that you should take a Transport just to manipulate the number of drops that you have in your army. Although manipulating the number of drops that you have is a commonly underrated tool that Transports provide, you should generally include a Transport to help Transport or protect a unit or units, as that is their primary function.
There are two other things that you can do to help adjust your odds of going first or second. If you have an army that usually wants to go first, consider looking for ways to cut down on the number of drops in your army. Maybe combine units, replacing two cheap units with one expensive one, or consider a Transport, as long as the Transport has another useful function.
The other thing you can do is remember that you have choices regarding your decisions during game set up. There’s a roll off to determine who goes first. However, the winner gets to pick who goes first. If you win the roll off, and you want to go second, just pick to go second. In addition, if your opponent wins and chooses to go first while you want to go second, don’t roll to Seize Initiative. It’s a completely optional choice, and if you like the turn order, don’t try to change it.
Well, that wraps us up for today. As you can see, there’s actually quite a bit of nuance to going first or second, and the reasoning behind why you want the position you do. Make sure to check out next week’s article, where we cover some techniques for getting the most out of your screens!

Warhammer 40k Winning Lists June 11th Edition
With summer in full swing, we see a refreshing number of tournaments kick back up globally, ranging from 3 to 7 rounds


