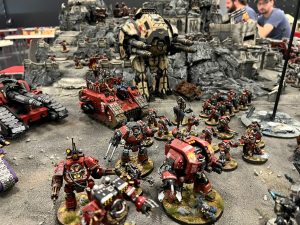
Welcome to Warhammer Tactics! Today, we’re going to be looking at how to optimize the way we handle our Charge and Fight phases with step by step tutorials so you can play like a professional! Today we’re going to continue our lessons on the Charge and Fight phases, but we’ll be looking at units that can fight multiple times, units that have the FLY keyword, and more. By the time we’re done, you’ll be a total pro at handling the Charge and Fight phases. Like last time, we’ll be using some generic infantry models that are easy to distinguish from one another. These models are simply stand-ins for the many various units that exist in the 40K universe.
To begin, we’re going to look at a rather simple lesson, which is punishing players that spread their units too far apart. Of course it goes without saying that there are definitely times where stretching a unit to the max can have many tactical benefits in terms of board control. However, when it comes to trying to prevent charges, it can be very to punish if your opponent spreads too far out. Let’s take a look at our first photo.
 As you can see, we have a unit of Witch Elves that are about 3” away from a unit of Cultists that are very spread out. Just past those cultists is a casino chip representing an objective, about 6” away from the cultists. Finally, we can see that we have rolled a 7 for our charge range, and the path that our initial charger is going to take. He’s going to end up 1” away, making it a successful charge. We’re able to move through the enemy unit because they are our charge target, meaning we can move within 1” of them. In addition, they’re spread out basically to the max of 2”, which leaves gaps for us to fit through. We’re going to take advantage of this and charge through them, and finish with our unit controlling the objective. Let’s look at our next photo.
 We’ve now moved our initial charging model, and since the model we moved is within 1” of the enemy, it’s a successful charge. Now, we get to move our other models. We’re going to move our next model to get within 3” of the objective, and to be within 1” of the first model we moved. This way we are controlling the objective, and still eligible to make our attacks. The path that this model takes has been drawn out so you can what it looks like. Again, we move through the enemy, which we can only do because of how spread out they are.
 As you can see, we’ve moved a second model from our unit to control the objective. In the above photo, I’ve actually moved this model a tad too far, judging by the measuring tape. This was a minor mistake on my end when taking photos, so if it looks like the model controlling the objective is a little out of coherency, that’s probably because it is. When you make these maneuvers in your real games, make sure you maintain your unit coherency. Now that we control the objective, we simply move the rest of our models into position, and then we make our attacks to kill the enemy.
 And now we have something like this. This photo is taken before we complete our Consolidate move. For this example, our target was an objective, which means we probably don’t need to move at all. However, in a real game our target might be another enemy unit, perhaps a character or some fire support. Regardless, you can use the techniques we went over last week to get the most mileage you can with your units.
Next, we’re going to look at a little bit of tech that you can use when calling in Reinforcements with the FLY keyword. We’re going to be digging up a little Geometry for this one! Take a look at our set up photo.
 Let’s pretend that our Witch Elves have the FLY keyword for this example. We’ve drawn a triangle that illustrates distances from the enemy Poxwalkers in the building. In blue, we have what I will call our “True Distance” from the enemy. We have to be outside 9” of the enemy unit, and we’ve drawn a diagonal line from the closest Poxwalker to the closest Witch Elf to illustrate that. Now, time for some geometry!
We are 9” away, as you can see. However, because we can FLY, we can move across terrain as if it wasn’t there, which means we can climb without spending movement. In green, we have the horizontal distance to get directly underneath the enemy Poxwalkers, which is only 6”. In yellow, we have the vertical height we would need to climb to get on the same plane as the enemy poxwalkers, which is about 6.7”.
These two measurements along with the “True Distance” measurement creates a triangle. Normally, if a unit were to charge these Poxwalkers and they wanted to get on the same level as the Poxwalkers on the top floor, they would need to roll a 12, as that would get them within 1” of the enemy. They could spend 6.7” climbing up, and the other 5.3” going across the table, ending .7” away from the enemy.
However, we can FLY, which means we can skip spending movement to climb floors. That means if only roll a 6 for our charge distance, we can move 6” across the table, and as part of that 6” move, move up 6.7” without spending movement. Functionally, this means that even though our physical “True Distance” is 9” away from the enemy Poxwalkers, we can successfully charge them with only a 6” charge roll! In fact, the taller the terrain that the enemy stands on, the more likely charges become, as long as we have the FLY Keyword.
Once we make our charge, we can position ourselves a little out of the way with the rest of the unit, and close in to make our attacks as part of our Pile In move. We won’t be illustrating the rest of this example as it’s relatively straight forward. The important piece of information that you should take away is simply that units that can FLY can punish your opponent if they try to hide in tall terrain. Let’s move on to our main lesson for the day.
We’re going to close with a slightly lengthier tutorial on how to maximize our potential with units that have the ability to fight a second time in the Fight phase. For the purposes of this tutorial, it isn’t important how the unit is able to fight twice. The information will be equally valid regardless of method. Let’s look at our set up:
 There’s a lot going on with this photo, so let’s break it down. At the bottom of the page, we have a casino chip. This is our objective that want to reach with our Witch Elves. This objective could be an enemy unit that we want to tie up, or even an actual objective in a real game. As you can see, it’s about 17” away. To be precise, it’s about 16.5, which is still pretty far. In addition, we have a unit of Cultists and a unit of Poxwalkers that are in the way. As a bonus, we’ll also cover how to pin the Poxwalkers as part of this tutorial.
For now, let’s just pretend that our Witches declare both the Cultists and the Poxwalkers as charge targets. It’s important that we declare them both as charge targets, because units that charge can’t make attacks against enemy units that they didn’t declare as charge targets. (Fight Phase, Section 5.3, first paragraph). We make our charge move, which you can with the two white and red dice is a total of 6”, and we move to get into melee range. For this tutorial, we won’t be taking pictures of every little step, since by now you should be very comfortable with what these techniques look like.
 We’ve completed our charge move, and it’s time to activate. Our Witches Pile In along the path that I’ve drawn in red, using their 3” of movement to loop around the enemy. They then make their attacks and wipe them out, and consolidate 3” towards the enemy Poxwalkers. That ends the Witches first activation, which should leave them looking something like this.
 Now, it’s time to move onto the Witches second Fight activation. As you can see, they’re very close to the enemy unit. If you wanted to pin the Poxwalkers instead of kill them and push past them, it’s actually quite simple. When you declare your charges, simply don’t declare the Poxwalkers as a charge target. You handle the first combat as normal, and when you activate again you Pile in and Consolidate into the Poxwalkers to create your pin. Even though you’re Fighting again, the Poxwalkers aren’t a legal target for you to attack because you didn’t declare them as a charge target. Therefore, you have a very easy pin set up that you can go for.
On the other hand, if you want to clear past the Poxwalkers to whatever lies beyond them, you do declare them as a charge target. This makes them a legal attack target, so you activate your Witches a second time, Piling In around the side like before, making your attacks and killing the enemy Pox Walkers, and then consolidating towards your target. Just keep in mind that this final consolidate has to have you move towards the closest enemy unit. So, if the closest enemy unit is to the side of you, you’ll have to get creative to make sure you add in enough sideways movement to make the final consolidate move legal. If you do everything right as we’ve laid out here, you’ll end up with something like this.
 This is what you’re looking for after you Pile In.
 And this is our final position. We’ve managed to plow through multiple lines of enemy units and secure our objective.
This wraps up our tutorial on close combat. Obviously, there are almost a countless number of ways you can apply and mix these techniques. What’s important is bestowing you with the same tools that many of the top 40K players use to push their armies to the limit. The more you practice and experiment, the better you’ll get. Eventually, you’ll be playing like a true professional! Make sure to check back in next week when we conclude our article series by going over a couple of techniques you can use to defend against or mitigate the tactics we’ve discussed today.
Warhammer 40k Winning Lists June 11th Edition
With summer in full swing, we see a refreshing number of tournaments kick back up globally, ranging from 3 to 7 rounds
