
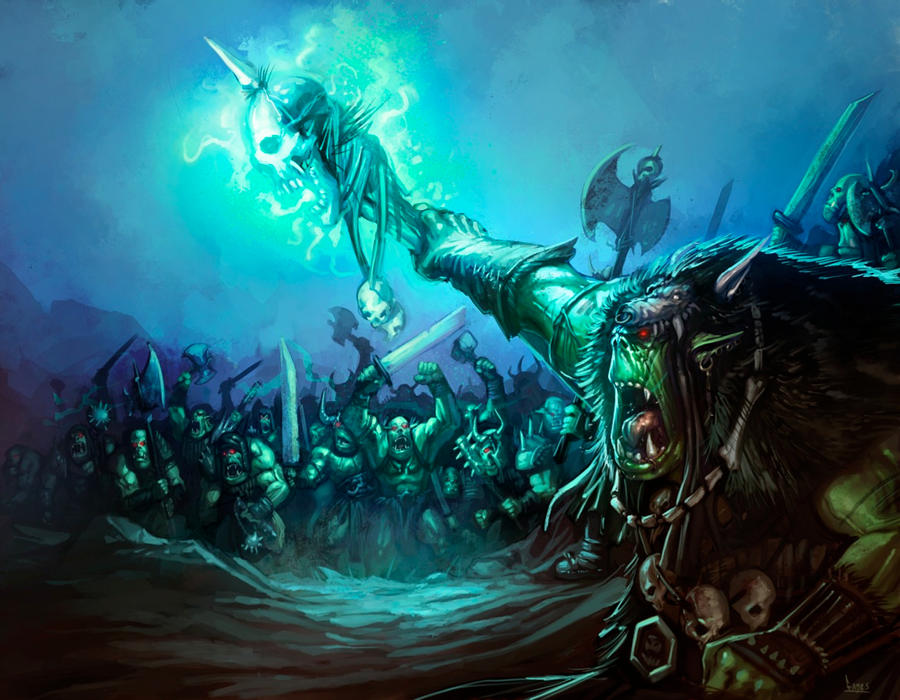
This is your complete guide to Orks Tactics Warhammer 40k 9th Edition!
Orks. Is there anything more fun and entertaining than the good old “WAAAGH!” yell? WAAAGHs are back, along with updated, improved, and new features, tools, and functions. The opposite of graceful, Orks are noisy, competitive, bombastic crews perfect for the player looking to bust onto the table. That said, Ork history is sacrosanct to long time Warhammer players, and this edition highlights Ork lore and culture in mechanics and form.
The most common criticism of these Orks tactics: they’re a mess. While the design of Orks isn’t flawless, that’s part of the deal—they’re messy, chaotic, and a hell of a lot of fun when you get them on the table.
Trust us: these Orks tactics are the hot mess you need in your gaming life.
Who Should Play Orks?
You Should Play Warhammer 40k 9th Edition Orks If You:
- Enjoy ramshackle, aggressive, yet strategem-based play
- Are not overwhelmed by datasheets and an abundance of choices
- Like playing for fun more than competition value—or you know you’re going to get smoked and want to have fun while you lose
- Value total table domination over perfectly executed precision
- Rushing models to the center of the board
- Controlling momentum of combat within the first two turns
- Rolling fistfulls of dice
And we’ll show you all of the above and more Orks tactics in the guide below!
Overview of Orks Codex
Players’ opinions of Orks tactics vary, as they’ve been largely nerfed since the advent of stratagems. However, 9th edition changes it up with a primary and secondary aspects for each mission, which is where Orks can really shine. The secondary goals are complex and not necessarily how you should spec your army build. Winning Primary missions and collecting points is still the goal, but you have to keep these secondary goals in mind.
Orks tactics present units to annoy, units to present maximum damage, and tough units whose goal it is to stay standing. A balanced build in this regard may dominate less overtly and risk loss of board control on turn three, but has a greater chance of stifling your opponent’s secondary objective. Since this edition dictates that you score Primary the turn after, longevity is more important. You can keep your Orks on the board by adding a significant amount of vehicles to your list.
Ork Strategems and Tactics
We recommend reviewing the strategems prior to constructing your Orks list. Certain Detatchments do not allow the use of Strategems, while the others do. You can’t use Strategems with the following Detachments:
- Auxiliary Support
- Super-Heavy Auxiliary
- Fortification Network Detachments
Additionally, many Orks tactics work with vehicle-inclusive Detachments. Consider this when you build your list.
Careen!
This is the ultimate Mad Max: Fury Road move, and emblematic of why Orks are totally badass.
What it looks like: An Ork driver with steering wheel in hand drives the remains of a destroyed vehicle into a cluster of enemies, much to the delight of nearby Orks.
The mechanics: You can use this when your occupied Ork vehicle isn’t in Engagement Range of enemy models. Before resolving the explosion, your vehicle model may make a normal 6” move.
Cost: 1 CP unless it’s a Wagon or Titanic model. If so, it costs 2 CP.
Get Stuck In Ladz!
Orks love a party. This Orks Tactics gives you a boost when the Orks that bash heads together hang out together.
What it looks like: Orks get rowdy, and naturally bust into the foe’s path due to their forceful nature.
The mechanics: As it sounds, use this in the Fight phase and lasts until the end of the phase. Use this when Beast Shagga Boyz or Boyz are selected to fight. Move an additonal 3” when each unit makes a consolidation or pile in move.
Restriction: Cannot use with other mechanics providing a distance bump on pile in or consolidation.
Cost: 1 CP for 10 or fewer models in unit; 2 CP for more than 10.
Ramming Speed
Sometimes the best way to stop an enemy is to simply run them over. And yeah, Orks do that.
What it looks like: Vehicle-inclusive units plow into their nemeses.
The mechanics: Use in Charge phase with an Ork vehicle unit. Lasts until end of phase. Chose an enemy unit in Engagement Range and roll a d6. On a 2+, your chosen enemy gets D3 wounds.
Cost: 2 CP
Gun Crazy Show Offs
All guns are the Flash Gitzs’ favorite guns. Sometimes they need to show off their gear and their moves.
What it looks like: Pew pew! Yep, you get an extra shot because you’re that smooth, Ork friend.
The Mechanics: Choose one Flash Gitz and use at end of Shooting phase.
Cost: 2 CP
Hit ‘Em Harder
Klaws. Killsaws. Slash and cut! Violence really begets violence when it comes to Orks tactics.
What it looks like: Orks fight hard, and sometimes they go into a frenzy. Empowered by their comrades, they pack an extra slash or cut.
The Mechanics: Use in the Fight phase with a Meganobz unit. When a unit attacks with a Killsaw or Klaws, add +1 Damage characteristic. Lasts until end of phase.
Cost: 2 CP
Tough as Squig-Hide
Working with beasts requires resilience. Squig-Hide is also advantageous in battle.
What it looks like: Thick, resilient Ork-skin.
The Mechanics: Use this when the other player selects a Beast Shagga Infantry, Beast Shagga Monster, or Beast Shagga Cavalry as as a target of attack. Lasts until end of phase. An unmodified wound roll of 1-3 fails on that unit. Model or weapon modifications do not count.
Breakin’ Heads
You know what helps Orks keep their heads in the game? A nice, motivational head-butt from their boss. Like ya do.
What it looks like: A discouraged Ork gets pulled by his boss, who then bashes the Ork’s head to his own until they get hyped up for battle once more. The Ork is then inspired to fight on!
The Mechanics: Use in Morale phase when you fail a Morale test for a <Clan> unit (except Gretchins). The <Clan> unit suffers D3 wounds, but your Morale check passes.
Cost: 2 CP

Orks Is Never Beaten (Epic)
Orks must win. Resilience is a core concept of Ork beings and Strategems.
What it looks like: Orks might not be the smartest, but their slowness in some areas is made up for the fact that they take a while to regenerate.
The Mechanics: You can use this in the Fight phase on an Ork model that meets the following conditions: a) hasn’t fought this round; b) is destroyed. Instead of removing the model, it can attack once it’s unit’s done attacking. Remove the model after you’ve resolved its attack, and if it takes damage or has any change in characteristics before resolving, use the bottom row of its profile.
Cost: 2 CP
Da Bigger Dey Iz… (Epic)
Orks really make an impact—battle the big guys. This simulates the effect.
What it looks like: A headline might read: Fearless Beast Snagga Warboss Does Mega Damage to Titanic Unit. Got a big baddie? This is the way to end them.
The Mechanics: Use this in Fight phase with a Beast Snagga Warboss that has been selected to fight. Every time a model in that unit decides to attack a Titanic unit, gain +2 to that attack’s Damage characteristic. This lasts until the end of the phase.
Cost: 2 CP
Extra Gubbinz (Requisition)
In this Orks tactics, one Ork gets the shiny!
What it looks like: One lucky Ork gets to run around with a super shiny artifact. If the sun’s out, it’s glinting mockingly over the surface of the artifact.
The Mechanics: Use this Strategem when you are mustering before the battle. You must have a Warlord with the Orks keyword to make it work. Assign one Ork character to receive the Shiny Gobbinz Relic. You can’t give a second Relic to a model using this Strategem, though, and you can only use it once unless you’re playing Onslaught (use thrice) or Strike Force (use twice).
Cost: 1 CP
Big Boss (Requisition)
Great team players need a greater big boss, and this Strategem reinforces that hierarchy.
What it looks like: An Ork gets a fancy field promotion!
The Mechanics: Use this Strategem when you are mustering before the battle. You must have a warlord with the Orks keyword to make it work. An Ork model may receive one Warlord Trait (which they could acquire). It must be unique and the model is only considered a Warlord for the purposes of enacting that trait. This Strategem can’t give a model a second trait. You can only use it once unless you’re playing Onslaught (use thrice) or Strike Force (use twice).
Tide of Muscle (Strategic)
Imagine coming upon an army of Orcs. They’d probably look unbeatable, right? Right.
What it looks like: Before the opposing army stands a massive force of Orcs. It’s pretty intimidating, and you bet they benefit from it. It’s a good look.
The Mechanic: You must use this Strategem in the Charge phase during Core selection (excluding Gretchins). The units ignore any charge roll modifications.
Cost: 1 CP
Unstoppable Momentum (Strategic)
This Ork Strategem is inspired by the ferocity of the Smasha Squig. Onward!
What it looks like: Orks don’t tire easily, and even when they do, they’re too stupid to quit. Once they charge, they’re able to do so again.
The Mechanics: This Strategem is for use in the Charge phase on Smasha Squigs. If there aren’t opposing models within Engagement Range, the model may charge again.
Cost: 1 CP
Grot Shields (Strategic)
An army is nothing without its stalwart resuppliers. Let’s honor them.
What it looks like: Resuppliers function to redirect foes to heartier targets.
The Mechanics: Deploy this Strategem at the beginning of the other player’s Shooting phase. Pick an Ork Infantry unit and target a friendly Gretchin Infantry unit within 6” of the Ork Infantry unit you selected. The enemy cannot target the Gretchin Infantry unit until the end of the phase if the Ork Infantry target is closer and visible.
Cost: 2 CP
Tellyportia (Strategic)
Boom! Yep, our Ork friends, though born of fungus, can transport by teleportation.
How it looks: A brilliant flash of green lightning, and an Ork isn’t where he was. Instead, he suddenly appears elsewhere.
The Mechanics: Use during deployment and pick a non-Monster Orks unit. It must have a power rating of 20 or less. Set it up on a tellyportia pad instead of the battlefield. You can then move it anywhere on the battlefield as long as it’s more than 9” away from the enemy models. Do this in the Reinforcement phase. Embarked units remain so when set up on a battlefield if this is a Transport unit.
Cost: 2 CP
Lumbering Strides (Strategic)
Onerus, cumbersome war machines don’t always have to be the struggle buses.
How it looks: Orkish war machines surge forward when there is a chance to fight!
The Mechanics: This is for use in the Charge phase with use of ‘Ere We Go on a charge roll for a Stompa, Grokanaut, or Morkanaut. Instead of having to re-roll both dice, re-roll only one.
Cost: 1 CP
Burn ‘Em All! (Strategic)
Ever see an Ork get excited and just blow it all to smithereens? Yeah, that’s how this works.
How it looks: Someone got extra enthusiastic about missile offense. In short? BOOM. And more boom.
The Mechanics: Used on a burna-bommer unit with skorcha missile racks. After resolving skorcha missile attacks from this type of unit, units within 3” of the target get 1 mortal wound.
Cost: 1 CP
Monster Hunterz (Strategic)
It’s rare, but Orks can be smart and organized. Behold: Beast Snaggas.
How it looks: Coordinated mobs of Beast Snaggas in Monster Vehicles divide and conquer more efficiently than a pack of velociraptors (hopefully) leaving a field of corpses behind.
The Mechanics: You can use this one at the start of any phase by selecting a single enemy Vehicle or Monster unit and up to three of your Beast Snaggas. Every time one of the selected enemy units attacks your Beast Snagga units, you add 1 to the attack’s wound role.
Cost: 2 CP
Cuttin’ Flames (Wargear)
Pretty sweet, making flame thrower devices into torches.
What it looks like: Burna Boyz set to work on the field, modifying weapons on the fly. From a sea of sparks and smoke emerge reforged weapons: intimidating, brutal cutting torches.
The Mechanics: Select one Burna Boyz unit in your army during the Fight phase. Whenever a Burna Boyz from that unit attacks with a melee attack, until the end of the phase, the attack gets Armour Penetration characteristic of -2. You cannot use any improvement abilities for Armour Presentation characteristics.
Cost: 1 CP
More Dakka! (Wargear)
Orks don’t exactly pace themselves when it comes to firing weapons. There’s no finesse, only winning at all costs.
How it looks: Orks with weapons going through ammunition like there’s no tomorrow…because there might not be, and if there is, their descendants will respawn from this very battlefield anyway. The ultimate carpe diem flex.
The Mechanics: Select any Orks unit from your army during the Shooting Phase. Dakka weapons become within half range when it comes to how many attacks you can make with the weapon. Lasts through phase.
Cost: 2 CP
Cloud of Smoke (Wargear)
Lots of running and racing makes lots of smoke, which can be an advantage in battle.
How it looks: Choose a Speed Freeks Vehicle unit during the Shooting phase. Whenever another Speed Freeks Vehicle from your army is within 6” of that unit, subtract 1 from the attack roll of a ranged attack that targets said unit.
Cost: 2 CP
Tankbusta Bomb (Wargear)
What can we say? It’s a real blast.
What it looks like: Something’s up with that Tankbusta, as it struggles to make one attack. But when it hits…well, it hits. Boom!
The Mechanics: Use with an Ork Tankbusta Bombs unit in the Fight phase. Choose one model in that unit and limit its attack to one this phase. It must target enemy vehicle unit with said attack, but if it’s a hit, the unit takes 2D3 mortal wounds and the entire attack sequence stops.
Cost: 1 CP
Snagga Grapple (Wargear)
Want to really toss an enemy around? This will work.
How it looks: Beast Snagga Boyz drag enemies to the ground with their hooked choppas. It’s as brutal as it sounds.
The Mechanics: Choose one of your Beast Snagga Boyz units at the beginning of the other player’s Movement phase. Whenever a non-Titanic unit is within Engagement Range of your selected unit, roll a D6. If you get a 4 or higher the enemy can’t Fall Back this Turn.
Cost: 2 CP
Groundshaker Shells (Wargear)
It’s a stunning intimidating tactic. Orks drive fear into the hearts of their enemies.
How it works: Orks fire shells right over the heads of their enemies to produce terror.
The Mechanics: Use this Strategem in the Shooting phase when you select a target. This lasts until the end of the phase. Every time the selected model makes a ranged attack on a non-Titanic, non-Flying model, if you score a hit, halve the Move characteristic until the beginning of your next Movement phase in the target unit and remove 2 from Advance and charge roll results for that unit.
Cost: 1 CP
Force Field Boosta (Wargear)
Here’s a concept: spin things so fast it creates a force field. Yep, Orks do that.
How it looks: Kustom force fields get extended by extreme spinning of allll the spinny bits.
The Mechanics: This is a Strategem you use at the beginning of your opponent’s Shooting phase. Pick one of your models with a kustom force field. The kustom force field gets replaced with the Aura ability. You cannot use the kustom force field because it overloads, making the Strategem usable once per battle.
Top 5 Orks Tactics for Warhammer 9th Edition
The Nights at the Game Table team has come up with the following tactics to maximize your success with the Ork Codex. Consider trying these tactics when playing Orks.
Ork Army Building Tips
When you start to build your Ork army in this edition, carefully consider the fact that Orks can be heavily mechanized, particularly with Orks in trukks.

Trukk Boyz and Trukk Tips
The Trukk Boyz need an update—right now they’re a bit broken. Because they can be at risk of losing their kulture and the kulture is required to utilize much of the mechanized features (such as trukks), it can be frustrating to use Trukk Boyz in trukks. This is obviously frustrating, as they are clearly meant to occupy Trukks. Only clan models can ride in the trukks, but they can’t really do so. Once this is fixed, one of the more successful tactics will involve en masse Trukks with Boyz—for days!
One-Time Uses
Many Strategems and Relics (as well as other features) have only one-time uses. Using power moves without consequence is pretty on brand for Orks, but consider balancing these single-use elements with multiple use elements to ensure some of your Orks make it to the last round.
Objectives
As mentioned in the introduction, Secondary Objectives can reflect outcome, but if you build your entire army to complete Secondary Objectives, you may do so to the detriment of Primary Objectives. This is something that’s taking us a while to master, and the success of Secondary Objective focus is heavily dependent on what type of army you’re playing against and how the other player chooses to focus.
Stompaz
Stompaz are among the most entertaining models to play in the game; they really encapsulate Ork-ness. However, aside from a few specific Stratagems, they’re challenging to fit into a larger tactical strategy when compared to other unit types.
Suggested Combinations
The 32” Threat Range Revel: Take 2 kill rigs. Move them and the Boyz can get out after the move and still advance AND charge right out of the kill rig. You get the kill rig move and then the Boyz move. The kill rig moves 12 inches, the Boyz come out and move 3, +5 inch move, advance, and charge. This gives them a whopping 32” of potential threat range right out of the gate.
The Boyz are Back in Town: Secure all of your objectives with Boyz. If they’re both on the same spot, the op sec unit secures it. This works in other lists, too, but with Orks, you can run a trukk up on objective. Your opponent won’t want to kill the trukk because they know a bunch of Orks will pop out.
Tankbusta Tango: We’re still mad about when buggies got nerfed. People are going to take Tankbustas just for the nostalgia, and that’s great if you also add trukks, giving maneuverability and avoiding wasted jumps (which you can use Boyz for instead). Remember, Kustom also gives 5+, but you can only have each Kustom job once.
Frakkin’ Fortress: A Fortress on Wheels with a Battle Wagon could be effective in combination with smaller transport or indirect shooting vehicles. Kill rigs take the cake, though.
Womp With WAAAGH! Here’s our team’s best advice for using waaagh: use it on turn 2 or 3.
- On Turn 1: Movement
- In Turn 2: Advance and charge
- Then on Turn 2 or 3: Waaagh away. Make sure you have a ton of boyz on the board.
Use force field boost Strategem on Pain Boyz for boost. You’ll get a save where you get a save from the force field—and that’s important since Orks don’t typically get armor saves.
Waves Over Forest: We all know people love to sit in forest terrain with their armies to weaken your charge. Who wants that -2 penalty? Circumvent it by using Tidal Muscle. You’ll avoid that penalty.
Weeeeeeee: Slingshot across the board with Unstoppable Momentum with Knobb on Smassha Squig. Usually a charge creates moretal wounds, but if you use the Strategem that allows for double charge when there are no nearby models in engagement, you can charge in, do mortal wounds, kill unit, and use the Strategem to charge again.
Deployment Zone Doorstop: With this tactic, you can jam up your opponent in their deployment zone and keep them there. This requires 45 commandos and 45 Storm Boyz as Death Skullz. Death Skullz gives them op sec, and while Commandos are one point more than regular Bozy and Storm are 2 points more, stunting your opponent in their own deployment zone is worth it. Move 6+ inches, advance, charge with WAAGH after that. The opponent is unable to score on first two turns and your commanders are op sec. This almost surely secures a win.
Ork Detachment Abilities
In 9th edition Warhammer, Orks come with some excellent Detachment abilities. To qualify as an Orks Detachment, the group can only include Orks keyword models. It does not include models utilizing the Unaligned keyword.
What happens when Orks form Detachments?
- Troops units (not including Gretchin units) get the Objective Secured ability. For more information about how Objective Secured works, check out the Warhammer 40,000 9th Edition Core Book.
- Units with <Clan> (not including Gretchin units) get the Clan Kultures ability.
Ork Detachments, per “I’m Da Boss!”, are able to have one Warboss or Deffkilla Wartribe model. No more than one of these is permitted in each Detachment of your army. However, your army may have multiple Detachments.
Use Specialist Ladz to Harness Clan Abilities Plus Detachment Abilities
Do you want to have an Ork detachment without eliminating the Detachment’s ability to become a Clan Detachment? You can make that happen by using Specialist Ladz. These units won’t benefit from Clan Kultur unless they have the necessary <Clan> keyword. Here are the Specialist Ladz units:
Makari
Kaptin Badrukk
Ghatghkull Thraka
Zodsrodo Wortsmaggr
Mad Dog Groftsmin
Specialist Mze units
Kill Rigs and Named Characters for Use in Detachments
In 9th Edition Warhammer, characters and Warlord Traits are tied. In other words, if one of the below characters gets a Warlord Trait, they are limited to the specific one tied with them. If you’re interested in including characters with Warlord Traits, we suggest choosing the Warlord Trait you’re aiming for, then picking the character based on that trait, as they’re tied.
To strategize in this fashion, we’ve reversed the standard table, encouraging you to choose trait before character. If you’re interested in Beastgob as a Warloard Trait, you have two options.
Warlord Trait Character
| Warlord Trait | Character |
| Beastgob | Zedgred Wortnagga |
| Scaly as a Squiggoth | Mozrog Skragbad |
| Follow Me | Ladz Makari |
| Beastgob | Kill Rig |
| Killa Reputation | Kaptin Badrukk |
| Proper Killy | Gharghkall Thraka |
| Big Gob | Boss Zagitrok |
| Brutal but Kussin’ | Boss Saikrot |
Orks Clans Overview
Battle-forged armies’ Orks Detachments consisting entirely of models from the same clans and Specialist Ladz can become a Clan Detachment. Don’t forget to include the name of the clan they’re from on your roster, which is a requirement for using Clan Detachments.
Orks clans gain their own Ork Clan Kulturs, Ork Clan Warlord Traits, Ork Clan Relics, and Ork Clan Stratagems. Before you get started, there are some important overview notes to consider:
- Clan Kulturs: <Clan> Orks units (not counting Gretchin units) can access a Clan Kultur. The clan kultur depends upon which clan they are from.
- Clan Warlord Traits: Clan Warlord traits are also clan-based. Orks <clan> character models with Warlord Traits may select Clan Warlord Trait instead of a regular Warlord Trait. Kill Rigs and named characters are tied to specific Warlord Traits, however.
- Clan Stratagems: Every Ork clan gets its own associated Stratagem. You can execute these Stratagems by having an Orks <clan> Warlord lead your army.
- Clan Relics: Additionally, every clan is associated with its own Clan Relic. You can use a Clan Relic if you have an Ork <clan> Warlord leading your army.
As you can see, there are specific advantages to setting an Ork <Clan> Warlord to lead your army. Below is a list of the Orks Clans.
List of 9th Edition Warhammer Orks Clans
Orks Clan Goffs
Why You Should Play Clan Goffs
You want a big, dumb, ferocious, hit ‘em over the head Ork clan. They’re good for a swarming hoard strategy, but not so keen on well thought out tactics and precision. Goffs are all about ferocious overwhelm and have little nuance or panache. They’re kind of your ride or die battlefield murder buddies.
Clan Goffs Kultur: No Mukkin’ About
No Mukkin’ About Klutur provides the following:
Whenever a Clan Goffs kultur model makes a melee attack, any hit roll of 6 (unmodified) gets +1 hit.
Whenever a Clan Goffs kultur model makes a melee attack, it gets +1 to the attack’s Strength characteristic if that model’s unit either performed a Heroic Intervention or made a charge move on this turn.
Clan Goffs Battle Tactic Stratagem: Unbridled Carnage
Cost: Cost: 2 CP
What it looks like: Goffs strike unrelentingly, inspiring and exciting other Orks!
How it works: Use on one Goffs Character or Goffs Core as long as that model has the No Mukkin’ About Clan Kultur. Use at beginning of the Fight phase. Lasts until the end of the phase. Whenever a model in that unit attacks, it gets an extra hit when the unmodified hit roll is 5+.
Clan Goffs Warlord Trait: Proper Killy
This Warlord Trait represents the Goffs’ brutality. Imagine them cinematically stomping over the very corpses they made just seconds ago. The effects are as follows:
- The Warlord’s Attacks characteristic gets +1
- The Armour Penetration characteristic gets +1 whenever the Warlord attempts a melee attack
Goffs Clan Relic: Da Irongob
The Irongob on the head of the Warlord is pretty intimidating, but also brutal. Consider the damage a headbutt can do when this thing’s attached to a cranium!
- This Relic works on Goffs models only.
- Select a single enemy unit within 1” of Da Irongob’s bearer.
- Roll a D6. If 2+, the targeted unit gets D3 mortal wounds.
- This occurs after a close combat attack involving Da Irongob’s bearer, but before consolidation.
Ork Clan Bad Moons
Clan Bad Moons Kultur: Armed To Da Teef
Think brutal, but shiny and ostentatious. That’s Ork Clan Bad Moons. They are total show-offs, wearing war trophies and specially crafted goodies to go along with tales of triumph. They’re also pretty quick, decent with bombs and targeting. And do bandoliers count as pretty, shiny things? Clan Bad Moons would say YES–enthusiastically! As a result, Bad Moons gets:
- A +6 inches to the Heavy weapons and Dakka models Range characteristic
- Score an unmodified wound roll of 6 on a ranged attack? Great–Clan Bad Moons gets a +1 to the Armour Penetration characteristic on that attack.
Clan Bad Moons Battle Tactic Stratagem
Cost: 1 CP
What it looks like: Part of the reason Clan Bad Moons is so well armed is due to their wealth. And what do rich Orks spend money on? Ammunition, obviously. Since they can always buy more, Clan Bad Moons will spray bullets without abandon.
How it works: Select a Bad Moons Character or Bad Moons Core model to shoot. This Stratagem lasts until the end of the phase. Whenever a model in the unit makes a Dakka weapon attack, get a +1 to an unmodified hit roll of 6.
Clan Bad Moons Warlord Trait: Da Best Armour Teef Can Buy
Since Clan Bad Moons like to wear their wealth upon them, and much wealth is metal in nature, it ends up providing them with extra protection. The effects are as follows:
- The Warlord gets a 4+ invulnerable save.
- Armour Saving Throws taken for this Warlord get +1
Bad Moons Clan Relic: Da Gobshot Thunderbuss
Imagine golden projectiles. That’s what happens when a weapon requires lots of teeth to make it work. Yes, Bad Moons, we know you’re rich, and your enemies will know, too, once they’re pommelled with gold bullets.
This weapon (Relic) uses kustom shoota only and replaces a kustom shoota. It has the following attributes::
- 12 inch range
- Heavy 206 type
- AP: 1
- D: 1
- S: 5
- Auto hits all targets
Ork Clan Evil Sunz
Clan Evil Sunz Kultur: Red Ones Go Fasta
Clan Evil Sunz members believe that speed runs in their blood, hence the red paint on everything. This belief seems real, as the “red wunz go fasta,” as the old Ork adage says. By focusing on this aspect of their heritage, the Kultur of Ork Clan Evil Sunz can be called upon to make speedy maneuvers on the battlefield. Here’s what it looks like:
- Models with this Kultur get +1 inch to movement unless they are a Speed Freeks model. If so, they get +2 inches
- All units with this kultur get +1 to Advance rolls
- When firing Assault weapons after their unit Advances (same turn), these models do not take a penalty
Clan Evil Sunz Battle Tactic Stratagem: Drive By Dakka
Cost: 2 CP
What it looks like: Evil Sunz run so fast, they just look like a blur of red as they zoom past their enemies on the battlefield.
How it works: Use this Stratagem with an Evil Sunz Speed Freeks unit. This occurs during your Shooting phase. Your selected Evil Sunz Speed Freeks unit cannot charge this turn, but you can immediately make a Normal Move with it as though it was your Movement phase.
Clan Evil Sunz Warlord Trait: Fasta Than Yooz
Warlords of Clan Evil Sunz aren’t just fast, sometimes they don’t stop as they hurtle into or past their enemies. The whoop and yell as they triumphantly lead the Kult of Speed.
- Choose an Evil Sunz Core unit within 6 inches of your Warlord.
- You can declare a 4 charge with this Evil Sunz Core unit even if you have already. chosen to Fall Back or Advance with this unit this turn.
Clan Evil Sunz Relic: Rezmekka’s Redder Paint
There exists a red paint created by Rezmekka. Naturally he named it “redder.” So bright is this red paint that it blazes the eye when painted on armor. The glint and glimmer of this red does more than add to speed…it can be painful for enemies to witness, especially if the Evil Sunz unit wearing it is rushing by in a blur.
- This Relic only works on Evil Sunz or Vehicle models
- The model bearing the Relic gets +2 inches to Move
- If your Warlord is in the Engagement Range of enemy units, your opponent cannot fight until any fight-eligible units you possess have fought. This occurs at the start of the Fight phase.
Ork Clan Snakebites
Ork Clan Snakebites Kultur: Da Old Ways
Clan Snakebites is about avoiding reliance on technology that other clans have adopted. They like hitting stuff with big sticks to fix it, and hype themselves up using more primal measures such as encouraging snakes to bite them. By doing this frequently, Clan Snakebites warriors train to embody a more resilient attitude when it comes to battlefield prowess.
Clan Snakebites Battle Tactic Stratagem: Mystic Chanting
Cost: 1 CP
What it looks like: Members of Clan Snakebites don’t believe in the existence of psykers or Psychic powers. As we know, belief (or lack thereof) converts to real power on the battlefield.
How it works: One selected Snakebites unit in your army can try to deny a psychic power as though it were a Psyker. Do this during your opponent’s Psychic phase.
Clan Snakebites Warlord Trait: Surly as a Squiggoth
A Clan Snakebites Warlord has gone through much training and survival. This consists of regular interaction with serpents, who bite continuously and venomously. A Warlord from Clan Snakebites has a skin that is tough, rippled, and riddled with bite marks revealing their experiences with the snakes. This toughness is represented in the Warlord’s traits and abilities:
When this Warlord gets destroyed for the first time, you can roll a D6 and set the Warlord on the battlefield again on a 4+ roll.
- If this happens, they have D3 wounds remaining and you must set them as close as possible to where they died–yet not within Engagement Range of enemies.
- Roll the D6 at the end of phase.
- Cancel any other rules that trigger when this Warlord model is destroyed.
Clan Snakebites Relic: Brogg’s Buzzbomb
What do you get when you build a stikkbomb around a buzzer squig hive? A buzzbomb, the invention of Brogg. This bomb harnesses the energy of the buzzer squigs within, propelling them at enemies when an Ork launches it at an enemy. The squigs calm between battles, making the relic reusable. Brogg’s Buzzbomb has the following characteristics:
- 6” Range
- Granade 3D6
- S: 5
- AP: -1
- D: 1
- Bearer can only use weapon once per battle.
- Can target targets not visible to the bearer with this weapon.
- Attacks with this Relic score a hit on a roll of 2 or more, regardless of modifiers.
- To reflect the danger and sting associated with this weapon, all units within 6 inches of the target receives a mortal wound of 1. Note: this applies to friendly and enemy units.
The Conclusion on Orks Tactics?
Overall, the key to success with Orks is making a fast charge in the first two moves and removing the opponent’s ability to score in the first two rounds to establish more control. From there, it’s attrition and survival.
What do you think of these Orks Tactics? Tell us in the comments below!


