Goooood morning ladies and germs! Last week I talked about how to determine a units true value, and look passed simply how much it costs in points or power level. This is an incredibly valuable skill when building lists on your own, but being able to evaluate a unit’s true value is even more useful in game. It allows you to make accurate decisions on target priority, and gives you a frame of reference on what units to protect/sacrifice. Pragmatically, it allows you to understand how to create trades with your opponent, which hopefully result in your favor in the end.
Trading is a concept I see a lot of people talk about, but very rarely understand in depth. Trading in the context of 40k is exchanging something you have for something your opponent has. There are two ways to trade in 40k, you can either make a good trade or a bad trade. A good trade is one where the trade is favorable to you in either the short or long term, whereas a bad trade is simply one where the trade was not worth it for you. In an ideal world, you never make bad trades. Trade opportunities come in many different shapes and sizes, and evaluating a trade can be anywhere from incredibly complex to incredibly simple.

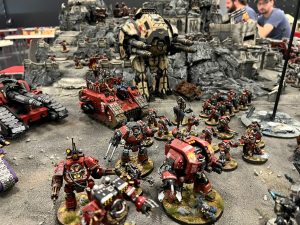
Let’s take on a “simple” example for now. You’re playing Imperial Guard with Blood Angel allies. You have a brigade with a ton of dudes, a spearhead with a bunch of artillery and the classic BA Battalion of 2 Smash Captains (Thunder hammer, jump pack, storm shield), and 3 units of 5 scouts. Your opponent is running Knights with a Castellan, 2 Crusaders, and a Gallant. On your first turn you see an opportunity to use your stratagem Upon Wings of Fire on one of your Captains to get into his Castellan.
To evaluate this trade we need to first figure out the actual cost to you for doing it. Here are the facts about the situation:
- 1 CP for Upon Wings of Fire
- 2 CP for Descent of Angel’s in order to reliably make the charge
- Potentially 1 CP to reroll a d6 should you still fail the charge
- 1 CP for Red Rampage (go big or go home)
- Either 3 CP to fight again, or 2 CP to fight when you die
- Potentially 1 CP for a random to hit or to wound roll (again, go big or go home)
- The Smash Captain is almost assuredly buying a one way ticket here, so you can assume he’s dead after this
- You roll 1d6 for each CP used and 1d6 for each strat used and regen a CP for each 5+ you get
So the maximum total cost formula = 9CP + Smash Captain – (14d6 5+ for CP regen)
On average, the expected cost should be about 4CP + Smash Captain

So what’s the pay off? That’s much more simple to calculate as it’s just the damage dealt to the Castellan.
A Death Company Captain charging with red rampage averages 7 attacks. Fighting twice would be a total of 14 attacks, hitting on 3’s rerolling ones. Let’s call that 10 hits. Wounding on 3’s with 1cp reroll should be 7-8 wounds. The knight will get a 6+ save from the hammer and enjoy a lovely 6-7 failed save for a total of 18-21 damage.
In summation, your total trade proposition is
4CP + Smash captain for 18-21 damage to a Castellan
But wait there’s more! Unfortunately it’s not as simple as just calculating cost vs benefit so linearly, you need to also look at it from a practical perspective as well.
This maneuver costs you ~4 CP after regen of your initial 21, and it also costs you one of your two smash captains which are by far your best way at handling Knights. The Knight player doesn’t even lose a Knight (though he may when you factor in artillery, but given the 3++ invulnerable, as the guard player you can’t count on that).
So, why would this be worth it?

Well, while it does cost about 20% of your CP, you need to evaluate what you are going to spend CP on. In this case probably just your other smash captain, a couple turns of Overlapping Fields of Fire and random rerolls. So the CP cost there is fairly negligible. Furthermore, while you are suiciding your Smash Captain, his role in this game is to simply beat stick into Knights, and realistically he won’t see much of a better opportunity. Finally, while you aren’t killing a Knight turn 1 necessarily, your alternative is not making this maneuver and just letting 4 healthy Knights exist going into your opponent’s turn 1, as opposed to 3 and a limping one. This would be an example of a good trade whos benefit is incurred in the long term. In such a simple match like this, the faster you remove the Knights the closer you are to winning, so there’s no real benefit for patience here unfortunately.
I turned this really simple scenario into an overcomplex explanation, so I could outline step by step how you need to evaluate these situations. I don’t want to scare you guys off, and make you feel like you’ll never be able to evaluate stuff like that, it’s really not nearly as cumbersome to figure out in the moment, and with a little practice it’s more like a fun puzzle to solve. However, oftentimes trading can be far more complex too.

This was a relatively easy scenario of figuring out your incurred cost and weighing it against the benefit received, however there are many more abstract trading opportunities in 40k. For example, trading half your army to completely kill your opponent’s mobility, this may end up being horribly inefficient point wise, but may also end up wining you the game if your opponent is forever trapped out of position. 40k is an incredibly complex game, and there is a myriad of complex decisions to make with tons of variables attached to them. To better understand how to make the right choices and evaluate things quickly and effectively, to the point where it becomes almost second nature become a PRO, and take part in my personalized coaching program!
